
Description Of File Menu Option
1. New :- This option is used to get a new blank page.
2. New From Template :- Through this, we use to take the default template design which is already given to us in the Corel draw by Corel company.
3. Open :- This option is used to open a CDR file previously saved to a hard disk.
4. Close :- This option is used to close Active current page of Corel Draw
5. Close All :- This option is used to close all open pages.
6. Save :- this option is used to save Corel Draw file in the computer Hard disk.
7. Save As :- Through this, we save the already saved document in a different name and can also be saved in any other format.
 8. Revert :- Through this, after taking the file which we have already created, there is some mistake while editing, then use it again to make it like new.
9. Acquire Image :- with the help of a camera or scanner, ACQUIRE IMAGE is used to insert any type of image in corel draw.
10. Import :- Use some kind of image and some other file to fetch in CorelDraw.
11. Export :- this option you can export your graphic into any other format.
12. Export for Office :- This option is used to export your graphics into png format and send it to MS office.
13. Send to :- The files created through this option are used for any other Drive, Mail,Zipped file and fax.
14. Prepare for service Bureau :- This option is mostly used when sending a design created in Corel Draw from one server to another. it is used by people whose work is mostly to design and send online designs. In this, When you save the pdf in addition to cdr and also which font you have used, this information is also saved. You can also save the font if needed.
15. Publish to the Web :- Used to publish any design in HTML or flash on internet.
16. Publish to the PDF :- it uses any type of graphics to create a PDF file.
Description of Edit Menu
1. Undo :- uses this to do a step backwards.
2. Redo :- uses it to do step forward, it only goes ahead when undo is high.
3. Repeat :- can repeat a task using it. You can also use Ctrl+R.
 4. Cut :- is used to cut (transfer) any selected graphic or text.
5. Copy :- uses this to copy the selected text or a graphic.
6. Paste :- is used to paste cut or copied objects or text.
7. Paste Special :- paste properly when objects or text copied from another software are pasted under Paste Special.
8. Delete :- is used to erase any selected text or guides.
9. Symbol :- uses any graphics on the page as symbols to be kept in a hard disk forever.
10. Duplicate :- uses to copy any object.
11. Copy Properties From :- Within any object created through it, the filtered color and the outline color are used to fill the same color on the other object.
12. Over Print Out :- it is mostly used to print outlines of any type of object accurately.
13. Over Print Fill :- it is used to properly print the color filled in any object.
14. Select All :- uses to select any text,object,guides,nudge through it.
15. Find and Replace :- use it to search for a graphic or text after converting.
16. Insert Barcode :- is used for inserting any type of Barcode through it.
17. Insert New Object :- is used to draw files from any other software in Corel Draw and after creation.
18. Object :- When a PDF file is imported into Corel Draw then it shows the option. This option contains a link that will open from your PDF Acrobat or through software that will be installed in your computer.
19. Properties :- use to bring Docker through it which is related to feel , outline, and link.
Description of View Menu

1. simple Wire frame/Wire Frame :- Used to display the outline of a graph drawn on any pixel.
2. Draft/Normal/Enhanced :- Used to display any graph created on a pixel in actual form.
3. Full Screen Preview (F9) :- Through this, all graphics created on the page are used to view in full screen mode.
4. Preview Selected Only :- Through this, we use only to view the selected object in full screen mode.
5. Page Sorter View :- Used to display all inserted pages in the same window.
6. Rulers :- It is used to hide and show the ruler.
7. Grid :- It is used to hide and show the grid.
8. Guideline :- It is used to hide and show the guideline.
9. Show :- In this, you will find options related to the page in which settings related to the border,
bleed, printable area,etc. of the page will be found.
10. Enable Rollover :- Used to turn on rollover.
11. Snap to Grid/Snap to Guidelines/Snap to Object/Dynamic Guides :- It is used to turn all these options on and off. Its function is used to see its angle point while drawing any object. It only appears when an object or line is drawn.
12. Grid and Ruler Setup/Guidelines setup/snap to Objects setup/Dynamic Guides Setup :- All these are used to change the settings.
Description of Layout Menu
1. Insert Page :- Pages are used by it to insert more than one page.

2. Delete Page :- is used to delete an inserted page.
3. Rename :- Pages are used by this to rename a page and write a page name.
4. Go To page :- uses it to navigate to a page. It is mostly used to visit a single page when there are more pages.
5. Switch Page Orientation :- Using this, you can make the page stand or landscape.
6. Page Setup :- uses to convert the inserted page to another size.
7. Page Background :- is used to give solid color and the effect of an image on any page.
Description of Arrange Menu
1. Transformation :- can give effect to the position size angle of any object and everything else, that is, it can set its rotation according to itself.
2. Clear Transformation :- is used to eradicate the effect imposed with the help of transformation.
3. Distribute :- is used to set any object from another object to the left right center and other distributes.
If after selecting any two objects, what will work on pressing the button according to the image below is written in the left side.
Note- If you want to use for an object, then first select the object you want to Align, then select the second object with the shift button between which to Align,then use the shortcut Keys
4. Order with :- the help of his option, you can set your selected object up and down.
|
|
|
|
|
|
|
|
|
|
|
|

5. Combine :- is used to combine one or more objects in parallel.
6. Break Apart :- is used to un-Combine a combined object.
7. Lock Object :- is used to lock any object, it keeps that object in its place.
8. Unlock :- is used to unlock the locked object. You can also unlock it by pressing the right button on the mouse and clicking on the unlock option.
9. Convert To Curve :- After converting it to rectangular, circle and all other objects, it is used to create different designs with the shape tool.
10. Convert Outline to object :- After breaking the outline of any object, use the outline to use it as an object.
11. Close Path :- Use a closed path to make a drawn line a complete line. So that the two ends of the line join together. Or you can also say that after drawing a single line, you can use it as an object.
Description of Effect Menu
1. Adjust uses :- jpg, jpeg, png, bmp and other images files to give a variety of effects such as contrast, enhanced, Tone Curve colors balance Hue saturation.
2. Transform has :- three options inside this option, which is used to give effect to png and jpg image-
 5. Blend has :- been used to tell you in the tool box itself, however, if you open from here, a docker will open in which you can blend according to the number of steps.
2. Transform has :- three options inside this option, which is used to give effect to png and jpg image-
- DeInterlace :- sometimes starts an effect like a lining while scanning an image, and uses it to remove the same line with its help, although more often than not, it becomes a light mesh. You can set it according to the odd and even line.
- Invert :- is used to adjust the color of your image, you can also call it negative.
- With the help of Posterize, you can use it to reduce or increase the tunnel effect on the image. its effect turns your image into a poster look but when this effect becomes more, then it also spoils your image.
3. Correction :- is used to reduce scratches and dust on any Bmp, Jpg, Png file.
4. Artistic Media :- Artistic media is used to set a brush, as soon as you take a shape, the artistic brush will immediately turn into Artistic and you will see the last used brush at top as soon as you open it.
5. Blend has :- been used to tell you in the tool box itself, however, if you open from here, a docker will open in which you can blend according to the number of steps.
6. Contour :- has also been mentioned in the tool box, on opening it, the docker will open in which after selecting to Center, inside, Outside, you write to keep the distance in inches by offset, and other steps in it, the layer you need it is written as it is required. if you want to use it without this Docker, after selecting it from your tool box, after going to the property bar and setting a point, the object on which you drag it will get a Framing Effects.
7. Envelope :- Blend stated above, the contour will also open it you have to use the same kind of shape tool After selecting any object, but if you're using the docker. Then you will get the option of Add New and Add Preset in which you can create your own shape with the help of Add New and using the pre-made shape with the help of Add Preset. Which the company keeps adding to it at the time of software development.
8. Extrude :- It has been told to you in the tool box that if you want to use from here, a Docker will open after opening, in which after selecting the object or text, You can apply 3D effect by clicking on the edit button and applying vanishing point in it. And you can also see its preview. After applying all the effects, the effects, the effect is applied to the text or object.
9. Lens :- It is used as a layer that shows the trailing object or text in effect, while any trailing object makes a difference. As soon as Frozen is clicked, it is copied and added to the layer above it. Which you can regroup and add your effect or any color. Inside it, you will find many effects which are named after- Brighten, Color Add, Color Limit Custom Color Map, Fish Eye, Heart Map, Invert, Magnify, Tinted Gray Scale, Transparency, Wire Frame.
10. Add Perspective :- It is used on converted artistic text. By applying it on any shape, it feels like it is stuck. While using it, you will see four nudges in which you use to apply it according to the shape.
11. Power Clip Inside :- uses it to place text or photos inside any shape. You can also drag it with the right button of the mouse, in this you will get the power clip Inside which is used for most images. if you want to use any change in the image after applying it to reduce the size, then right-click on it, adjust the image after adjusting the content and right click again and click on finishing editing. or click on the power clipped image with ctrl After editing, click on any empty part of the page with ctrl.
12. Add Rollover :- is used to add hyperlinks to any object with its help. which you have to use while staying in the coral draw. After applying it, you have to right click and click on jump to Hyperlink in Browser, which will open the hyperlink you have added to the Internet Explorer.
13. Clear Effect :- is used to remove the effect applied.
14. Copy Effect/ Clone Effect :- is used to copy effect with the help of both of them. It is used by taking a simple shape and if you select the shape of the effect applied and go to this option, then it will look a head. Like you have taken two objects and have written some text for both, give a Perspective effect on one while nothing on the other. Now you can click on the simple text and select that text by clicking on the perspective from the copy effect from the effect menu. If you click on the effect, as soon as you click.
 1. Convert to Bitmap With :- its help, you can use any created graphic to be used after converting it to a bitmap. And unless a graphic is converted to a bitmap, you cannot use the option of the Bitmaps menu.
1. Options/ Customization :- are used to change settings, commands, etc. in the software using both of them. And through this you can also assign your command to run from shortcut key.


1. New Window :- Uses this to use an existing page in two windows. By doing this, nothing is deleted from the page, but both remain the same.
Today We have Learnt about Corel Draw Menu Bars.Hope this lesson is helpful for you.
9. Lens :- It is used as a layer that shows the trailing object or text in effect, while any trailing object makes a difference. As soon as Frozen is clicked, it is copied and added to the layer above it. Which you can regroup and add your effect or any color. Inside it, you will find many effects which are named after- Brighten, Color Add, Color Limit Custom Color Map, Fish Eye, Heart Map, Invert, Magnify, Tinted Gray Scale, Transparency, Wire Frame.
10. Add Perspective :- It is used on converted artistic text. By applying it on any shape, it feels like it is stuck. While using it, you will see four nudges in which you use to apply it according to the shape.
11. Power Clip Inside :- uses it to place text or photos inside any shape. You can also drag it with the right button of the mouse, in this you will get the power clip Inside which is used for most images. if you want to use any change in the image after applying it to reduce the size, then right-click on it, adjust the image after adjusting the content and right click again and click on finishing editing. or click on the power clipped image with ctrl After editing, click on any empty part of the page with ctrl.
12. Add Rollover :- is used to add hyperlinks to any object with its help. which you have to use while staying in the coral draw. After applying it, you have to right click and click on jump to Hyperlink in Browser, which will open the hyperlink you have added to the Internet Explorer.
13. Clear Effect :- is used to remove the effect applied.
14. Copy Effect/ Clone Effect :- is used to copy effect with the help of both of them. It is used by taking a simple shape and if you select the shape of the effect applied and go to this option, then it will look a head. Like you have taken two objects and have written some text for both, give a Perspective effect on one while nothing on the other. Now you can click on the simple text and select that text by clicking on the perspective from the copy effect from the effect menu. If you click on the effect, as soon as you click.
Description of Bitmaps Menu
In this, after converting any graphics to bitmap, you can give a lot of effects as in the image above. And yes it does not work until we convert a graphic. Either we convert the graphic or take a jpg, png, bmp, image only then we can use all the effects of this menu.
Note:- Use it by Yourself so that you can understand its effect. Still giving some options here.
1. Convert to Bitmap With :- its help, you can use any created graphic to be used after converting it to a bitmap. And unless a graphic is converted to a bitmap, you cannot use the option of the Bitmaps menu.
2. Edit Bitmap With :- its help to convert the converted bitmap to corel photo paint.
3.Crop Bitmap With :- its help, you can crop a bitmap picture.
4. Trace Bitmap With :- the help of this option, any images file is used to create a soft copy of corel draw by tracing the help image of corel Trace software. After trace, you can make any changes in it.
5. Resample :- is used to increase the resolution of any bitmap image file with the help of this option.
6. Mode :- is used to set the mode in which you want to put your bitmap file.
7. Inflate Bitmap :- also uses bitmap to increase the pixels of the image with its help.
8. With this help, Bitmap color Mask is used to create a Transparent by removing a single background
.
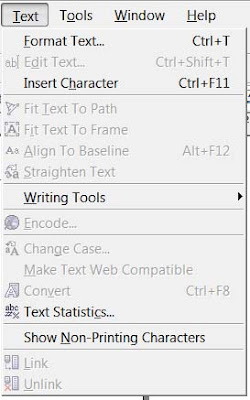
Description of Text Menu

1. Format Text :- It is mostly used to create selected text or paragraphs in style and model.
2. Edit Text :- is used to edit certain letters or text in any text or paragraph written.
3. Insert :- character is used to insert any type of outline word or a symbol.
4. Text to Path is used :- to place the converted text on any object by it on the object's outline, or drag and hold the text on the object by pressing the right button of the mouse and then releasing the mouse again opens an option is. In which you can apply text by selecting Fit Text to Path.
5. Text to frame :- uses any paragraph that is not converted to Artistic to fir the text frame which automatically sets the font size.
6. Align To Baseline :- is used to set any paragraph, word below the shape tool, in a line.
7. straighten Text :- is used to straighten any paragraph, word if it is slanted with shape tool.
8. Writing tool :- By this you can use any paragraph to write it accurately and set the spelling as a whole.
9. With :- the help of this option, you can use encode to change the encoding of the typed text, but keep in mind that when you use this option, then when you select another font then there is little chance of changing the font style.
10. Change Case :- Through this option you can change the case of written text in which Sentences Case, Lowercase, UPPERCASE, Title case, TOGGLE can CASE.
11. Web text Compatible :- When you select this option, you can change the text style in HTML to publish to the web document.
12. Convert To Artistic Text :- through this, is used to Convert text written in a text frame into artistic text which you can then resize according to your own.
13. Through this option, Text Statics uses to see how many words have been written in your entire page, which font is written from it, you can also see the artistic text in it.
14. Show Non-Printing Character Selecting :- any text and clicking on this option will show you the character that will not print, such as space and inter(change paragraph).
15. Link\Unlink :- is used to convert and break one or more text boxes into a single box, or drag the text from the right button of the mouse to another text box then release the mouse once the option will open in which you can keep the text according to yourself.
Description of Tools Menu
2. Color management :- Through this, colors are managed and colors can be selected according to quality. RGB, HSB, CMYK are the main ones.
3. Save settings As Default :- uses this to change the changed settings in the software as before.
- Note :- save settings as default followed by 7 options which are object manager, object Data Manager, View Manager, Link Manager, Undo Docker,Internet Bookmarks Manager, Color style. All these are used to bring Docker. And after bringing docker, you can control the all tools and settings.
5. Graphic and Text Styles :- it is used for text style. In this, you have to apply the settings after selecting the text. Similarly, we can apply any object.
6. Scrapbook :- uses it for inserting any clipart through it and inserting any clipart through the internet.
7. Create :- inside this you will find 3 options Arrow, Character, Pattern, all three are used separately. Arrow uses any shape drawn on the page through it to create an arrow. You have to use it an arrow option in a straight line or smooth line. Character also has the same function as Arrow but will only apply to the font you have created.
8. Run Script :- It is used for script code that is related to binary systems.
9. Visual Basic :- visual basic this is a small Vibius software which is very useful, you also get it in MS Office. It is used in the Developer menu to record the current work, as soon as you start the record it The VBA program will start running and recording the command you are doing. after all the work done you have to stop clicking the stop button again. Then if you want to run by running , then you have to go into play and select your recorded macro and press the run button. As soon as you press the button your graphic will be created by taking a small load.
Description of Window Menu
1. New Window :- Uses this to use an existing page in two windows. By doing this, nothing is deleted from the page, but both remain the same.
2. Cascade / Tile Horizontally /Tile Vertically :- All three are used to view pages containing one or more, in which you will get to see different previews of the three.
3. Arrange Icons.
4. Color Palettes :- It is used to add or change a color box.
5. Dockers :- use to fetch and remove any Docker.
6. Toolbars :- use to hide and hide any tool. For this you can also use this option by right clicking on the menu bar or status bar.
7. Close :- used to close the currently opened page.
8. Close All :- is used to refresh corel draw.
Writer: Mr. Krishan Kumar Saini
Today We have Learnt about Corel Draw Menu Bars.Hope this lesson is helpful for you.
No comments:
Post a Comment